Do you wanna build an IDS?
If you didn’t read that in the voice of Anna from Frozen, you need to go watch more Disney. But maybe later.
Anyway.
Hopefully you learned all about what an IDS (Intrusion Detection System) is from the slides, but in case you weren’t pay…err, in case you were … sick … let’s review.
What’s an IDS?
An intrusion detection system sits at the perimeter of your network and … detects … intrusions …
Ok well obviously it’s a little more complex than that. How does it do that? Well it looks for anomalous behaviors. OOoooooOooOoo big word, ey? It’s kinda like your networks bouncer – anything that looks like it doesn’t belong, it takes note of it, giving you the option to deal with the activity how you see fit (block it, allow it through, flex your definitely-not-steroid-induced-muscles, etc.) For example, say you’ve got a lovely web server. Remember that web traffic goes over port 80? Well maybe you’ve also got SSH and FTP running over 22 and 21, and maybe a few other random services. Your IDS expects these types of connections, so when 20 people connect to your server over port 80, it’s not really anything worth noting. But what about when someone tries to connect over port 79? Well .. I mean, eh. Whatever. But now they’ve tried to connect over 79, 80, 81, 82, 83, 84, … you get it. Something strange is going on. Maybe they’re port scanning you! AHHH!!! Run!!! PANIC!!! … ok don’t, but you get the idea – this behavior is strange, and therefore needs to be attended to.
IDSs to the rescue!!
The IDS I’m choosing for you to choose to use (hehe) is Snort. “Why should I?!?!” you ask indignantly? Well, pfSense has a built in plugin for Snort that makes it really easy to use and set up. And we’re computer people – let’s be honest: we’re lazy.
Pull up the webconfigurator page for your pfSense firewall. Hopefully you’ve got this all set up properly. If not you’re skipping steps. Shame on you. Go back to Lesson 7 Activity 2 and fix it. I’ll wait.
Just kidding, we aren’t waiting for them – let’s go! Go to the “System” menu option and select “Available Packages” to find and install the “Snort” package.
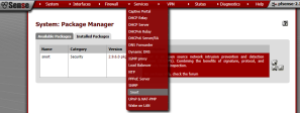
Now you can go to “Services” -> “Snort” to get to the Snort GUI for set-up.
Click on the “Global Settings” tab to get to the good stuff. Unless you feel like paying for things, which, I’m broke, so I’ll assume you are two, and therefore don’t want to pay for things, then the only list you want to check is the “Snort VRT Free Registered”. And yes, you’ll have to go get a FREE OinkCode (wut?) but if you’re too lazy to do that, you don’t deserve this IDS!!! It’s easy. Really.
Once you get your free … OinkCode … (that’s just silly), copy and paste it into the text box.
After that, you can select the ETOpen check box if you want, but to be honest, I’ve found it more trouble than it’s worth. It tends to throw a lot of false positives, which can get irritating, but if you’ve got the time to sift through all the rules and see which ones are causing issues, I suppose you could enable it. It’s a lot more intense. But if you’re brave, go for it!
Another setting to point out would be the “Rules Update Setting” – the defaults are probably ok, but considering that you’re likely doing a CDC, your timeframe is considerably shrunk, so you can set this to more frequently if you’d like.
You can manually update your rules, though, using the update tab (big surprise, hmm?)
But as of now, your Snort install has no idea what to do. It’s a bit of a lost puppy. And that’s sad. Let’s fix that, shall we?
Click over to the “Snort Interfaces” tab to add an interface so Snort knows where to do its thang.
Then add in your WAN interface.
Here you can send alerts to your pfSense logs (recommended), automatically block hosts that Snort feels are doing bad things (slightly less recommended, but up to you I guess), etc. After clicking save, it’ll return you back to the Interfaces page. But OH NO!!! You have an error!! It’s fine. Chill.
Note the warning icons in the image below showing no rules have been selected for the new Snort interface. Those rules will be configured next. Click the ![]() icon (shown highlighted with a red box in the image below) to edit the new Snort interface again.
icon (shown highlighted with a red box in the image below) to edit the new Snort interface again.
Click on the “WAN Categories”, and make sure the “Resolve Flowbits” option is checked. Also, check the “Use IPS Policy” checkbox. You can choose any one of the options in the box below, but you really can’t go wrong.
If you select the “Use IPS Policy” under “Snort IPS Policy Selection”, you won’t have to manually go through all the rules and select which ones to use. It’ll use the policy you selected earlier (connectivity, balanced, security) to select the appropriate rules.
Then click save! Yay!
Lastly, click the Snort Interfaces tab to display the configured Snort interfaces. Click the ![]() icon to start Snort on an interface.
icon to start Snort on an interface.
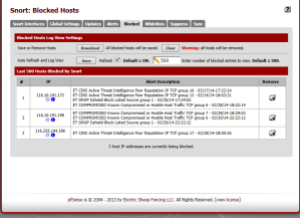
At any point, you can see what your IDS has blocked by going to the Blocked tab.
The alerts tab is also quite helpful – these aren’t necessarily hosts being blocked, but are events that have triggered alerts by your Snort install. From here, you can suppress alerts so that you don’t see them anymore using the “+ button. You can also use the “x” button to remove a block for that host. So if you find a false positive has triggered a block on a legitimate host, you can easily unblock them from here.


